Saturday, December 10, 2011

Dorie's Tarte Noir


Sorry I've been gone! Soo busy with school and trying to find time to be with friends. Oh well! A while ago I made Dorie's Tarte Noir, which was AMAZING. I made it gluten-free for my mommy! It was really easy to do - I just substituted the flour in the crust for all-purpose gluten-free flour, and added a little xanthan gum. I couldn't tell that it was different from the original recipe at all.
The ganache is very rich, but so good. My mom was happy with it, and she insisted on being the food stylist and photographer for the picture :)
Enjoy!

Friday, November 11, 2011

Vegan Chocolate Cupcakes


Sometimes the simplest things are the best. Warm blankets, fuzzy sweaters, and chocolate cake of course. My best friend and I were in the same math class last year. One day it was our friend's birthday, and we decided to make cupcakes for the class to celebrate. After having them once, the class became obsessed, and we became the official cupcake bakers. My friend's mom gave us a great recipe that happens to be vegan, but it also happens to be the best chocolate cake recipe I've ever used. The cake is moist and delicious. We always made these with a simple buttercream, leaving it off for our friend who can't have dairy.
Towards the end of the year, we were bringing in cupcakes nearly every week. If it wasn't a friend's birthday, we would find an excuse - some weird holiday, or a celebrity's birthday. It was always the same recipe - the only difference was that we would dye the icing a different color every week. We kept it simple. We once tried bringing in vanilla cupcakes (for my birthday), but they just weren't as good and we decided to stick to these.
I switched schools this fall when we started high school, but my best friend stayed at my old school. I still see her every weekend, but I miss those afternoons baking cupcakes for math class. A few weeks ago, she said she had volunteered to bring in cupcakes for a class, so we decided to make them together. Our old recipe, nice and simple. Yum.

Dairy-Free Chocolate Cake (from The Joy of Cooking)
Whisk together in a large bowl until well blended:
1 1/2 cups all-purpose flour
1 cup plus 2 tablespoons sugar
1⁄3 cup plus 1 tablespoon unsweetened cocoa powder
1 teaspoon baking soda
1⁄2 teaspoon salt
Add:
1 cup cold water
1⁄4 cup vegetable oil
1 tablespoon distilled white vinegar
2 teaspoons vanilla
Whisk until smooth. Scrape the batter into the pan and spread evenly.
Bake about 30 minutes, until a cake tester inserted in the center comes out clean. Let cool in the pan on a rack for 10 minutes. Slide a thin knife around the cake to detach it from the pan. Invert the cake and peel off the paper liner, if using. Let cool right side up on the rack.
*One recipe makes about 12 cupcakes - we always double it. Bake the cupcakes for about 15 minutes - check on them until a skewer inserted in the middle comes out clean.

Quick Buttercream Frosting (from Baking Bites)
1 cup butter, room temerature
2 tsp vanilla extract
4 cups confectioners’ sugar (approx. 1 lb.)
2-4 tablespoons milk

Cream butter with an electric mixer until soft. Add vanilla and gradually add in sugar until most has been incorporated. Mixture will look a bit sandy. Add in milk as necessary (start with 2 tbsp), along with any remaining sugar, until frosting reaches an easy to work with consistency.
*This frosting is so good, we eat it by the spoonful. Our teacher loved it so much, she asked us to bring in whatever was leftover for her. So every week, she got her own little tub of frosting. She says she used it as a dip for pretzels. Yum.

Sunday, October 9, 2011

Pão de Queijo


Also known as Brazilian Cheese Rolls. Also known as the most delicious balls of cheesy yumness you will ever eat.
My mom comes from Minas Gerais in Brazil, and if you ever drop by someone's house for a visit, you won't leave without being served warm pão de queijo. These are little puffs made of cheese and manioc (yucca) flour, and they are chewy and delicious! This is one of those dishes where everyone's grandma has their own special way of making them, and this is my grandma's recipe. It's a pretty typical one, and easy to make, so my mom and I decided to make it yesterday and teach you all how to do it too!
This recipe is soo much easier to make with two people, because you are going to stick your hands in the dough and make a mess (and who wants to do something that is that much fun by themselves??) Here we go...

You start with a big bowl. Our flat wooden one is actually special for making these, but any large bowl will do.

Here is the Brazilian yucca flour we use. This is hard to find outside of Brazilian supermarkets, but I've been told that you can substitute tapioca starch just fine. You mix 5 cups of this...

...with just under a tablespoon of salt...

...in the big bowl. Using your hands, make a large well in the center.

Now take a cup of water and a cup of oil. We use vegetable oil, but soy or canola works fine too.

Heat the liquids in a small saucepan until boiling.

Here's where it gets a little tricky. You want to pour about half of the oil in to the well...

... and mix it in using your hands. CAREFUL, the oil is BOILING. You can start the mixing with a wooden spoon if it's just too hot to handle, but try to do as much as possible with your hands. Then mix in the second half of the oil, also using your hands as much as possible. You want to incorporate all of the oil and really kneed the dough - this is what gives the rolls their great texture.

After kneading, the dough should have this texture. It is moist but still grainy.

Then you're going to need 5 eggs. Mix these in one at a time, still using just your hands.

The dough will look like this after all the eggs are added.

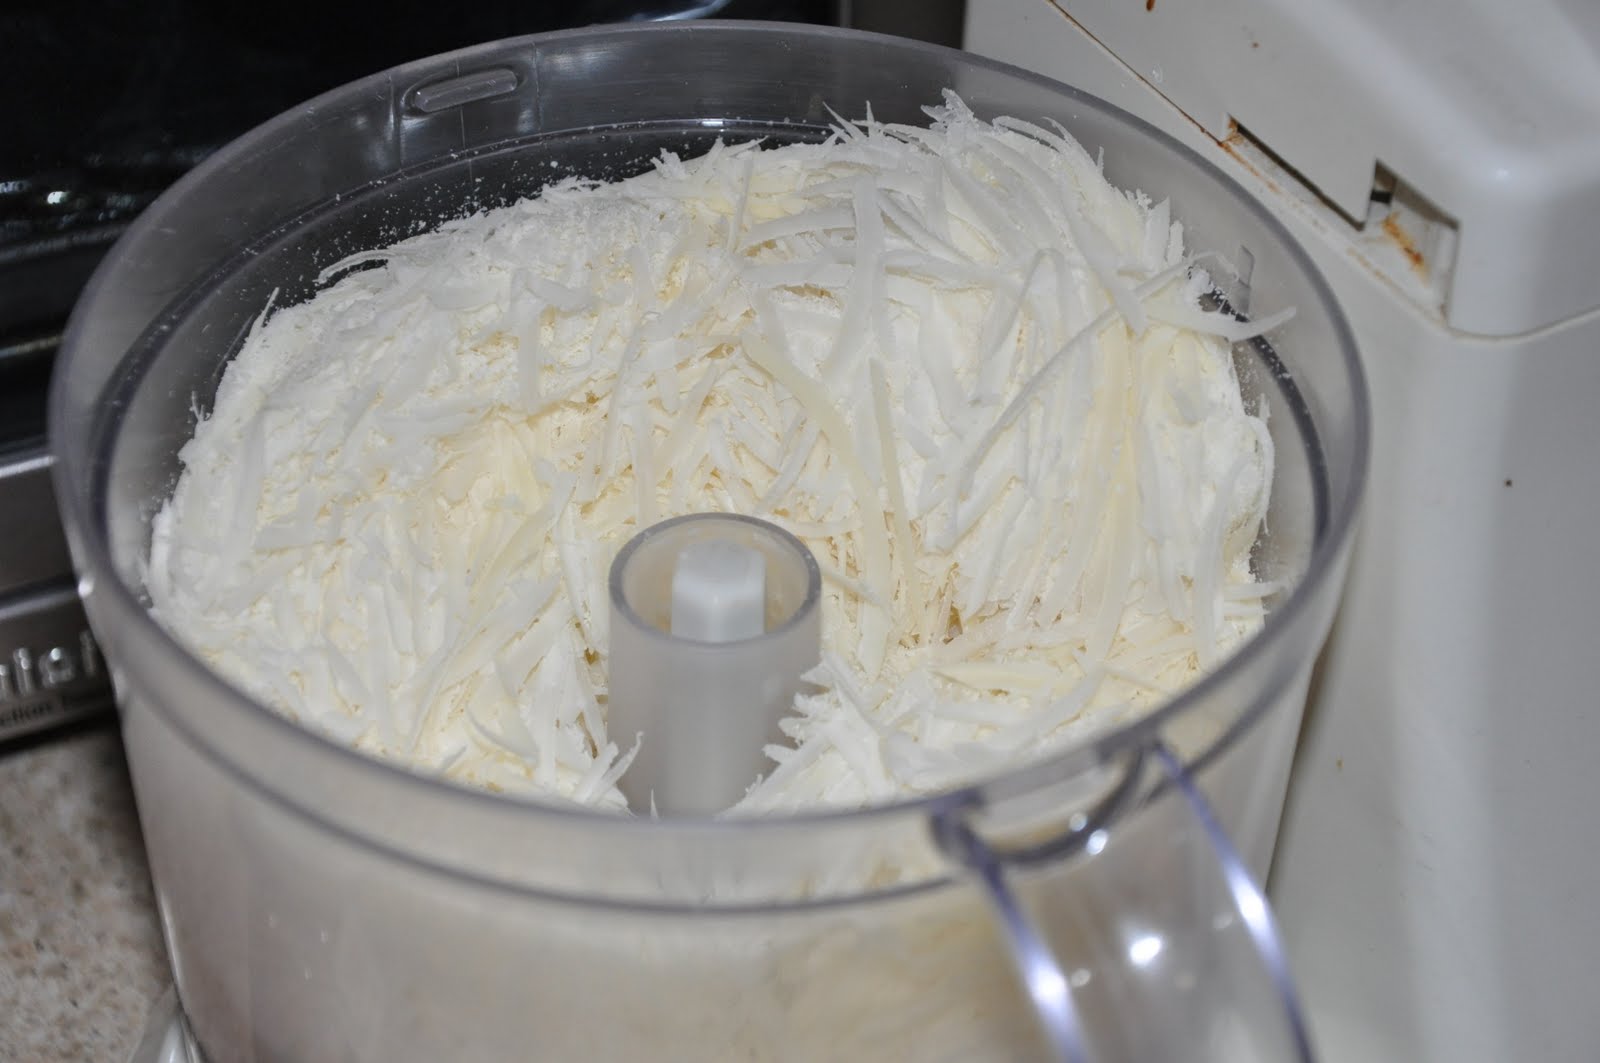
Then it's time for the cheese. Usually a special Brazilian cheese is used, but we decided to try using Pecorino Romano, because it's the closest to the one traditionally used. It ended up working out great.

Shred about 5 cups (loosely packed) of it. I think if anything has 5 cups of cheese, you know it's going to be good...

Mix it in with your hands!

Now it's time for the final step. You need 1 1/2 cups of cold milk (I know this only shows one cup, we added more to it later).

Mix it in gradually, still using your hands. Be warned, this dough is EXTREMELY sticky (this is where doing it with someone else comes in handy - one person pours while the other mixes).

It should look like this after all the milk is mixed in. Now it's time for rolling!

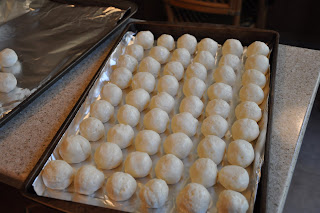
You want to oil your hands to keep the dough from sticking to them, and make small even balls. We used a small cookie scoop (1.5 tbsp) to measure it out. This recipe will make about 75, and they freeze really well. We like to flash-freeze the rolled balls (freeze them on a baking sheet and then put them in bags) so we can defrost them whenever we want, but feel free to bake them like this too (but spread them out more than we did - they are close together just for the flash-freezing).
Warm up the oven to 350 F...

...and stick them in there for 30 minutes, or until just starting to brown (the time is about the same for the frozen or room temperature ones). Smelling good...

Yum! They are best eaten when still warm.

This is what they look like in the middle. Don't worry, they are fully cooked - they are supposed to be moist and chewy like this.

The best part of this for my mom is, these are naturally gluten-free!
These are great on their own, or with a cup of coffee, but there are a few things you can do with them too. Brazilians like to make little ham sandwiches. Here at home we like sandwiching them with something sweet - dulce de leche or jam is great. We had some with fig jam, which was delicious.
Please please please go try these if you like anything cheesy... or chewy... or really if you want to try something new that is super delicious! Let me know how it goes :)
Enjoy!!!

Tuesday, October 4, 2011

Dorie's All-Occasion Sugar Cookies


Just a quick post today! I made these cookies last month when my grandma wasn't feeling well, because we were sending her a care package. This is a quick and easy recipe, and the dough is fairly easy to roll out once you get the hang of it. I haven't made that many cut-out cookies, so I wasn't sure how much flour I needed, and it turns out you need quite a lot. But I was still able to get lots of cookies out of the batch, and they were delicious! I sent some to my grandma, and she loved them, and I also took some with us to Brazil when we went to visit my mom's family. They were eaten up fast! I want to try these again at Christmas and decorate them with royal icing. Yummy... Enjoy!

Monday, October 3, 2011

Dorie's Summer Fruit Galette

Back in March, my mom had some general pain, and couldn't find the source of it. She had had tests for lots of different diseases, all of which had come back negative. After lots of tests, she discovered that she has Celiac disease, which means she can't eat anything containing gluten (wheat, barley, or rye). This really isn't all that difficult to deal with, especially when cooking at home, but the problem is cross-contamination. It turns out that in restaurants, everything has flour! Because of the disease, if her food even touches flour, it is "contaminated" and she can't eat it.
My mom loves sweets, and there are places that make gluten-free desserts, but they are often not that great, and you risk cross-contamination. I had been reading Celiac Teen, another teen food blog I find really interesting, written by Lauren, who is 18, about her dealing with Celiac disease. I saw that it was possible to make something really delicious without any gluten, and not crumbly and bland like the store-bought gluten-free desserts often are. I did a little research and decided to give it a try.
I decided that I wanted to make Dorie's Summer Fruit Galette, because it wasn't a cake or cookies, where the texture is so important, but the only gluten-containing part of it is the crust. Since then, I've used the recipes I always use with certain substitutions, but since it was my first time baking without gluten, I went on to King Arthur flour's website and found this recipe for pie crust. I bought their gluten-free flour mix (I don't trust myself to mix the flours myself yet), and the crust came together easily. I couldn't find "instant clearjel", so I didn't use it. The one difference I noticed in making the crust was how difficult it was to roll out - it was crumbly and dry, making it really hard to shape in to a pretty galette...

Oh, I know it's hideous. But it was so good. I used nectarines as the summer fruit, and their tartness went really well with the sweetness of the custard.
The crust? It was great. I honestly couldn't tell the difference from a regular "gluten-ous" crust, and neither could my happy mommy. So if you know anyone with Celiac disease, or have it yourself, don't be afraid of baking. Just do some research, try out some recipes, and be sure to keep the kitchen free of contamination (the one thing that can be annoying, especially when you do bake with flour as well).
We all loved this, and I'm not afraid to try baking without gluten anymore. Enjoy!

Sunday, October 2, 2011

4th of July Cake!


I'M BAAAACK! So sorry I haven't posted in so long, but I'm finally starting to get used to my new school and I have some time to start posting again. This is a cake that I made for the 4th of July. The original idea comes from Elissa over at 17 and Baking, which is one of the food blogs I love and look at all the time for inspiration. I saw this cake there and then all over on various blogs, and was looking for a dessert for the 4th, so I figured I'd give it a try.
I had quite a rough time making this! I made a simple yellow cake batter (supposed to be for 2 9" layers) and split it into 3, dying one part red and one blue. I baked up the 3 layers, let them cool, made a batch of frosting, and started cutting. It's actually pretty easy to assemble, but it was difficult for me because my layers came out quite crumbly. First the red and white layers are cut in half. One red half is stacked on one white half, and those two are set aside. Then comes the tricky part - the other red and white layer halves are stacked on top of the blue layer, and a circle in the center (about 5" in diameter) is cut out. Then the blue outer circle is stacked on the first red and white layers, and the centers of the second red and white layers are put inside of that. Am I making any sense at all??? Elissa explains it much better in this post.
The point is, it was super crumbly and tough to assemble, but in the end it tasted great and I was happy with how it came out. In case you were wondering, I used this recipe (from Allrecipes), which is my favorite yellow cake recipe. The only change I make to it is to use 4 whole eggs instead of 8 yolks. I love it and it comes out moist and flavorful every time.
This is a great idea for a 4th of July dessert (or any patriotic holiday you can come up with), and fun to make. Hey, why not make it for Columbus Day next week?
Enjoy!

Monday, August 15, 2011

Dorie's Chocolate Chip Cookies, revisited

Okay, I have a big post I'm working on for later this week, but I had to come on and write something really quick. Last February, TWD made "Dorie's Best Chocolate Chip Cookies". I thought they were great, but a lot of people complained about how flat they were. This didn't bother me so much, but I can see how a thicker cookie is more appealing. Since then I've made several batches of the cookies, and I figured something out; the key to making them thicker is really simple. First, increase the baking soda to 1 teaspoon. That little bit makes a big difference. Second, although they will look done at 10 minutes, bake them for 11-12. This will make them not sink once they come out of the oven. Third, if you have them, use thick baking sheets. Sometimes the thin flimsy metal ones bake less-than-pretty cookies. I'm still working on perfecting the recipe even more (haha, like I can do that....), but these changes certainly made the cookies less flat and bumpy.

Tuesday, August 2, 2011

A new sort of TWD

Okay, sorry, no pictures here - my camera isn't working right now. I've recently realized how much there still is for me to bake from "the book", and how since I really don't have all that much time, there's no way I can finish with the rest of the group, however much I would like to. So, I've decided. I'm not giving up on the book - I've done too much to do that. But I am going to just bake whatever I want from it, whenever I want, until I'm done. And I'll try to post on here more often :)
Recently, I've made three things from Baking from My Home to Yours. The first two were actually made the weeks that twd chose them, and they were both delicious. The first was the Cream Scones. These come together quickly and easily, and are best right out of the oven. I used a mixture of currants and raisins, and they were so good.


The second was the Chocolate Chunk Muffins. I had high expectations for these, and although they were great right out of the oven, I didn't find them all that good after they had cooled. They were fine, but for the amount of chocolate in them, you would expect them to taste more chocolate-y.
Earlier this week, I made a recipe that was chosen a while back: the Split-Level Pudding. These were actually really good, although I must have done something wrong with the ganache, because it was still pretty liquid when we ate it. Oh well, it was delicious either way! We served them with whipped cream and raspberries.
So, what's going to happen with this blog? I don't know, but I'm going to try my best to post more often (and with pictures!), especially with all of the Dorie recipes I bake. Strangely, it motivates me to bake more knowing that I can choose anything I want - there's no reminder that I still have to bake this week's TWD. So, maybe there will be more posts on here than I think.

Update: I was able to find a picture of the muffins! (Obviously....)

Wednesday, June 22, 2011

TWD Rewind: Creme Brulee


I am SO sorry. I've completely neglected this blog, which is not okay. I've been super busy with a show I was in and then the end of school, which was crazy. This summer I'm attempting to get ready for my switch to a new school, but I hope I have time to post some more. I really haven't done any TWD, so I'm trying to get started on that again. My mom recently discovered that she has Celiac disease, making it harder to bake often, since our family is small and having one less person to eat wheat doesn't help.
This recipe is one that I actually made a while ago. It was simple and I had lots of fun caramelizing the sugar! I loved it and will make it again for sure!

Tuesday, January 11, 2011

TWD Rewind: Peanut Butter Torte


This week's TWD recipe was Fluff-Filled Chocolate Madeleines. I really wanted to make these, but I didn't have time. BUT, we had two of my friends and their parents over for dinner, so I decided to make a rewind for dessert. I decided on the Peanut Butter Torte, which took forever to make but was so worth it. It starts off with an Oreo crust. Then comes a peanut butter mousse, which has chopped peanuts and chocolate chips stirred in to make it crunchy. Finally is a layer of chocolate ganache, with more chopped peanuts on top. All put together, it's really good. My only comment is that Dorie says this serves 6-8 people. Um, no. We cut 11 quite big servings and only ate about half of the torte (because it is so rich). We ended up calculating that the whole torte could feed 25! If you want to try the recipe for yourself (please do), you can find it in the book. Enjoy!

Wednesday, January 5, 2011

TWD: Midnight Crackles


Hello there! It's been a while, hasn't it? I'm sorry - I had a show closing (Much Ado About Nothing, if you're wondering), and then I went away for Christmas and New Year's, which was a lot of fun. But now I'm back and just starting rehearsal for You're A Good Man, Charlie Brown (I'm Lucy), so I have a little bit more time. Yesterday I didn't have rehearsal, so I came home right after school to bake this week's Tuesdays with Dorie! Yesterday was the group's third anniversary! I have loved being a part of the group, even if I'm not always one of the more... um.... participating members.
This week's recipe was chosen by Laurie of Slush and Jules of Someone's in the Kitchen. The dough for these was quick and easy to whip up. After reading the P&Q on the TWD website, I decided to only chill it for 20 minutes before baking. Ten minutes ended up being the perfect baking time for these.
From the title, I was thinking these were going to be really light and airy. They certainly weren't! That said, they were very good cookies. I didn't love them, but I liked them just fine and thought they were a nice easy, quick recipe to start off 2011. You can find the recipe on the hosts' blogs. Happy New Year!